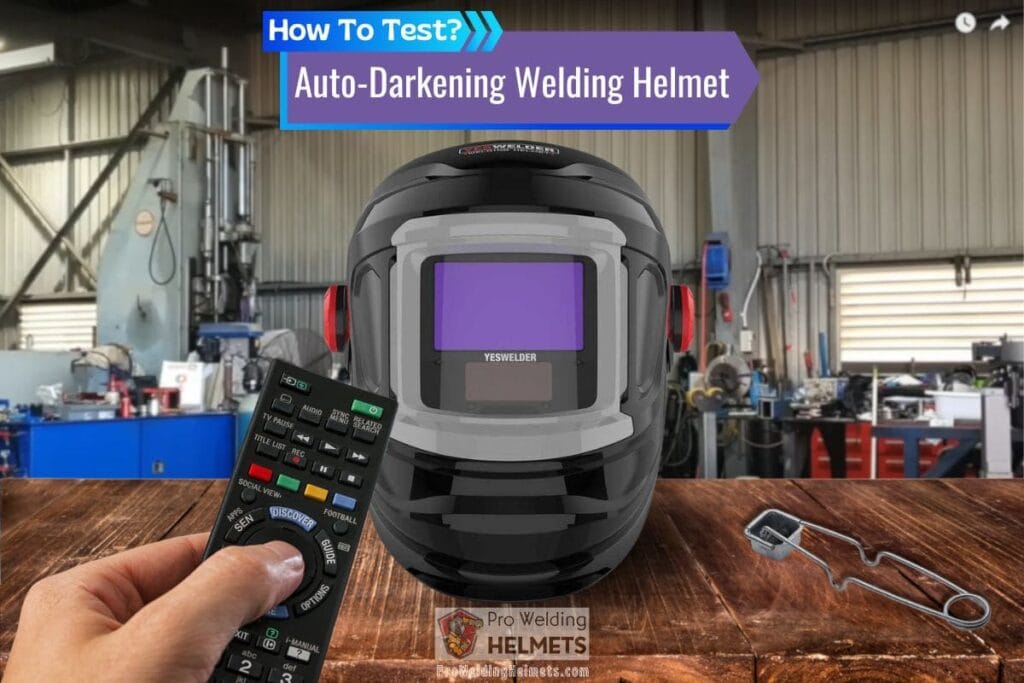
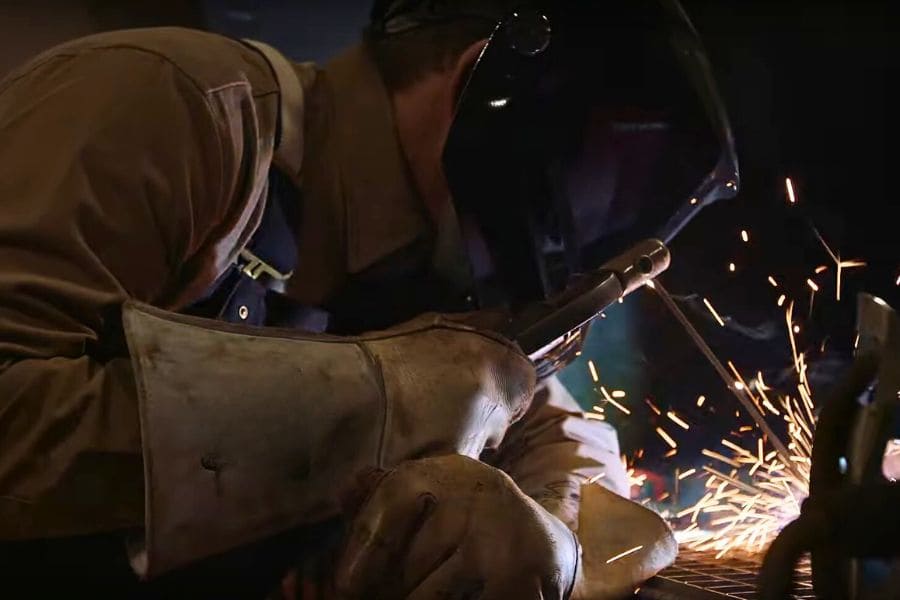
Howdy, fellow welders! One of the most important lessons I’ve learned in my career is the NECESSITY of TESTING my auto-darkening welding helmet before each use. I understood its significance after experiencing a malfunction with one of my old masks. Thankfully, I detected the issue before continuing to weld, preventing a potential arc burn.
Either way, you must inspect your auto-darkening filter or ADF before getting started, especially if it has been a while since you last used it. After all, a welding hood is a crucial piece of protective gear designed to safeguard your eyes from harmful radiation. You’d always want to make sure it’s working fine to avoid any nasty surprises.
Wondering how? Well, here you go!

5 Ways To Test Auto-darkening Welding Helmets: Simple Yet Effective
The effectiveness of the self-darkening filter in protecting your eyes while welding depends on whether it’s performing as intended. Fortunately, there are several straightforward methods to test your helmet’s ADF, none of which are overly complicated.
1. Use The TEST Button
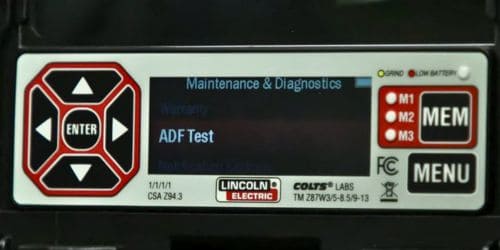
Modern auto-darkening welding helmets, such as the Lincoln Electric VIKING 3350, and KT-Elite 4-1078, are equipped with a TEST button on the ADF. Some models even feature a touch button labeled ‘ADF Test’ inside the control panel. To check if the lens is darkening properly, simply press the button. If the lens darkens, you’re good to go – it’s that simple!

But wait, there’s more! The self-test button also integrates a battery indicator to help you keep an eye on the charge. When you press the button, the tiny indicator should light up. If it doesn’t or glows dimly, it’s time to replace the battery. Very user-friendly, right?
Lincoln hoods have won me over with their thoughtful design, showcasing a deep understanding of welders’ needs. But if your automatic darkening welding helmet doesn’t have such a button, fear not – there are 4 more tricks that work for most.
Pros
Simple and straightforward method.
Does not require any additional tools.
Can also check battery status.
Cons
Only applicable to helmets with a TEST button.
2. Expose the helmet to Intense sunlight
The easiest way to examine your auto-darkening hood is to expose it to BRIGHT SUNLIGHT and see if it triggers the filter. All you have to do is put on the helmet and tilt it towards the sun. Here is how to do it-
If the ADF is functional, the lens should switch to the dark shade instantly. Even entry-level self-dimming welding gears activate in only 1/3600th of a second when functioning properly.
If you try this method, it’s important to expose the helmet’s sensors to the sunlight suddenly. Auto-darkening masks work by sensing instant spikes in brightness, not the overall brightness. This means it may not activate if you leave it in the sun for a while before testing.
Pros
Easy and quick test.
Does not require any additional tools.
Cons
Requires bright sunlight, which may not always be available.
Additional Note: This method may not be suitable for all helmet models, as some may require a sudden change in brightness to trigger the ADF.
3. Utilize A Bright Fluorescent Light
Now, what happens if you’re welding indoors or it’s a cloudy day? Well, fluorescent lamps can be a good alternative to sunlight for this purpose, and many workshops, including mine, use them. As long as the auto-tint welding helmet is functioning as intended, the sensor should pick up the bright light from the lamp and trigger the filter.
One of the benefits of checking your helmet this way, as opposed to the sunlight method, is that you can TURN OFF the lamp while still looking at it to see how long it takes for the lens to revert back to the lighter shade. Assuming your welding hood has a delay setting for the reversion, you could also test it after making any adjustments.
Pros
Can be used indoors or during cloudy conditions.
Allows testing of the delay setting.
Cons
Needs access to a bright fluorescent light.
Additional Note: It provides a controlled environment for examining the auto-darkening helmet, which can be beneficial for precise observations.
4. Test With Spark from Torch Striker Or Lighter
Another effective method to inspect a self-dimming welding helmet is by flicking on a GAS LIGHTER or TORCH STRIKER in front of the sensor. The spark generated closely resembles a welder’s arc and is bright enough to trigger the automatic darkening mechanism. Here is a nice video of the torch striker method:
Similar to using a fluorescent lamp, you can flick the striker on and off to observe how quickly the lens reverts back to the light shade. On the other hand, the pocket lighter method is especially convenient for smokers, as they typically carry lighters, and you could even borrow one from a colleague at work.
Pros
Easy to perform.
Simulates welding arc.
Can test the ADF’s sensitivity and delay settings.
Cons
Everyone doesn’t necessarily have a torch striker or lighter.
Additional Note: The method is most cost-effective and can be quickly performed in most welding environments.
5. Use An Infrared Remote
Did you know that the light used to test a welding mask doesn’t necessarily have to be bright? In fact, you could even use infrared (IR) light, which is invisible to the human eye.
You can use any remote control system (like TV and music systems) that uses IR lights to send signals. All you have to do is point the IR emitter at the sensor and press a button. If the helmet is performing as it should, this should trigger the auto-darkening lens and darken it. Here is how to do it:
So, how does it happen even though the light being used is not visible, let alone bright? Welding hoods are designed to block out both UV and IR wavelengths. This explains why detecting an infrared beam would cause it to darken the lens.
However, the IR signals used in remotes are not as powerful as the UV radiation generated during arc welding. The helmet might fail to sense it at all if the number of sensors is less or the range isn’t close enough.
How do I know this? Well, I personally faced this particular issue a couple of times, but cranking the sensitivity all the way up fixed it. You might also want to keep in mind that some remotes emit PULSED signals, which could cause your helmet lens to flicker between light and dark.
Pros
Assesses the ADF’s response to a different type of light.
It can be done both indoors and outdoors.
Very convenient, as everyone owns a TV remote control unit.
Cons
It may not always trigger the ADF due to the low power of the signal.
Additional Note: This testing strategy helps to understand the ADF’s sensitivity to different light wavelengths, which is useful for troubleshooting.
So, Which Method Is Most Effective?
While all of those techniques work fine in most cases, I’d argue that the TORCH STRIKER method is the best one. You ask why? Because, it is the most effective and convenient way to TEST the auto-darkening feature, as almost every welder uses torch strikers.
Apart from that, when welding outdoors, my favorite method is using SUNLIGHT. Speaking from personal experience, there are times when you don’t have access to fluorescent lamps, lighters, or TV remotes. But, on a bright sunny day, you can quickly test your helmet’s auto-dimming ability. I’ve often found myself at project sites where simply putting on the helmet and looking up at the sun is the easiest method.
However, for indoor use, we test our helmets with either the torch striker or the TV remote techniques before welding, as they are more accurate and faster to perform. If you want to test the delay settings, you can use either the fluorescent lamp method or the lighter spark.
But, Why Should You Test Your Helmet BEFORE Using It?
Your welding hood plays an indispensable role in protecting your eyes from the welding arc. Exposure to the welding arc can cause welder’s flash – a serious eye condition also known as ARC EYES.
It comes with several symptoms, including pain, bloodshot eyes, blurred vision, and a feeling of having something in your eye. The intensity of these symptoms varies depending on the duration of the exposure and the brightness of the arc.
If your self-darkening helmet fails to activate, it will leave your eyes VULNERABLE to the bright flash. To illustrate, in the light shade (usually shade #3), the lens allows a relatively clear vision of your surroundings. However, in the darkened state (usually shade #9 to #13), you can barely see what you’re looking at when you aren’t welding.
This should give you an idea of how much protection you’d be missing if your helmet suddenly didn’t activate and remained in the light state even after you struck the welding arc.
An auto-darkening welding mask can fail due to several reasons. The sensors could malfunction and fail to detect the flash, the filter might have worn out, the ECU could be faulty, or it could even be something as simple as a wiring issue. Unlike other types of helmets, it could even stop working because the battery ran out of charge.
With so many possibilities, it only makes sense to spend a minute or two testing the hood before you start welding.

But, What To Do If The Helmet FAILS The Test?
Well, if your helmet doesn’t pass the test, you shouldn’t use it until it does. There’s NO POINT in using a faulty mask while welding. You could try diagnosing the issue and fixing it yourself if it’s simple enough, or you’d have to get it repaired at a welding supplies store or repair shop.
Let me share a few troubleshooting tips from my personal experience, though.
Check For Drained Battery: To begin, remove the battery and check its power level. If the battery is depleted, it’s time to replace it with a new one to ensure proper functionality. Some auto-darkening helmets have an inbuilt battery charge indicator, making the process smoother.
Clean Dirty Sensors: If the battery appears to be in good condition, inspect the sensors for any accumulation of dirt or sludge. Cleaning the sensors thoroughly is essential, as a build-up of dirt can prevent them from accurately sensing the arc.
Set Correct Amperage: If the arc’s amperage is below the sensor’s activation threshold, it may fail to activate due to insufficient brightness. Consider increasing the helmet’s sensitivity, similar to the IR remote testing method. For low-amperage TIG welding, using lenses with lower shade numbers (#5 to #9) is crucial, as a standard #9 to #13 shade lens may be too dark for you.
Use Proper Shade Number: In cases where the hood darkens but not sufficiently, check if the shade number is set correctly. Particularly if you frequently weld at varying shades, it’s possible to forget to adjust the helmet to the necessary shade after welding at a lighter setting.
Adjust Operating Temperature: Welding in temperatures below 5 degrees Celsius can significantly impact reaction times, causing delays in activation. This can lead to prolonged exposure to harmful arcs. It’s important to ensure your helmet is suitable for cold weather welding and to take necessary precautions.
Tips To Make Your Helmet PASS Every Time
So, how do you make your auto-darkening welding helmet function every single time? Well, it’s not really rocket science – all you have to do is take proper care of it. Here are a few tips that might help:
Keeping your welding hood CLEAN is crucial. So, take care of it regularly to prevent dirt and slags from building up. Also, pay close attention to the sensors and lens cover to ensure they are spotless.
When you’re NOT using your welding helmet, store it in a cool, dry, dark place to maintain its condition, especially the electronic components.
Always check the BATTERY to ensure it’s charged. Consider switching to a solar-powered welding helmet to avoid battery issues altogether.
Regularly INSPECT your welding mask. Test the reaction times, delay and sensitivity controls, and clarity to ensure everything is working properly. Proper maintenance helps prevent problems and ensures your safety while welding.
As you can see, it’s all about maintaining your welding helmet in good condition and regularly testing it for any signs of problem. Now that you have a detailed idea of the different methods, you shouldn’t face any difficulties. Learn more about how to test welding helmets.
Key Takeaways
Always test your automatic darkening helmet BEFORE you start welding to ensure it’s working properly and will protect your eyes from harmful radiation.
There are five straightforward methods to test your helmet’s auto-darkening filter, including using the TEST button (if available), exposing it to intense sunlight, using a bright fluorescent light, using a spark from a torch striker or lighter, or using an infrared remote.
A malfunctioning helmet can leave your eyes vulnerable to the bright welding arc, leading to serious eye conditions like arc eye.
If your helmet fails the test, check the battery, clean the sensors, adjust the sensitivity, ensure the correct shade number, and consider adjusting the operating temperature. If these don’t work, get it repaired or replaced.
Regularly clean your auto-darkening welding hood, store it properly, check the battery, and inspect the hood to ensure it’s in good condition. Proper maintenance prevents issues and ensures your safety while welding.

